Category Archives: Linux

Getting started with the Arietta G25 board

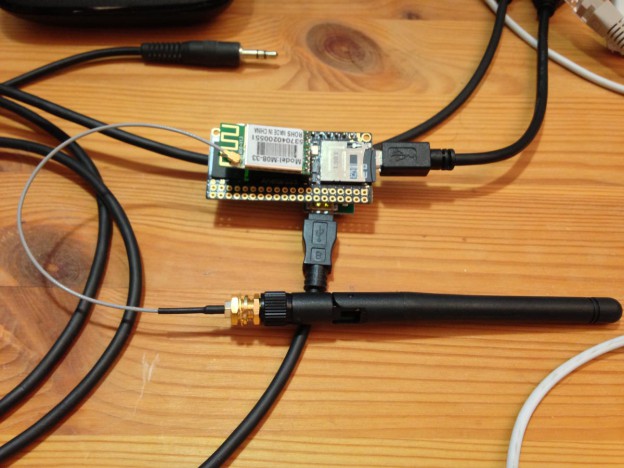
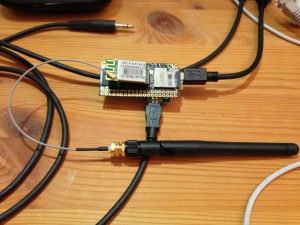
This weekend, I received my ACME Arietta G25 Atmel ARM board, and tried to get it going with my Mac. I ordered the “plain” version with 128 MB RAM, as well as one with 256MB RAM, as well as Wifi boards and the DPI debug board.

After soldering in the necessary posts, I attached the DPI board and verified that my Mac has the right FT232 driver to access the console, no problems here.

I then fired up by Ubuntu VirtualBox machine and followed the instructions to build the Micro-SD-Card image. I then proceeded to boot successfully from the card.

IMG_2989

Through the console, I could get the Wifi card going; since I wanted to have support for more than a single network, I extended the configuration through wpa_supplicant.conf.

ACME has configured a Gadget driver to supply an Ethernet interface through the host port on the Arietta; in ACMEs configuration, this is set to offer both RNDIS and CDC EEM modes. Unfortunately, Mac OS X 10.9 doesn’t support either.

After some more reading, I decided to build my own kernel and modules. To get a Mac-compatible setup for the USB Gadget driver, run menuconfig, and navigate to

  • Device Drivers
  • USB support
  • USB Gadget Support (at the very bottom of the list)

For Mac compatibility, de-select the RNDIS support and the Ethernet Emulation Model (EEM) support under Ethernet Gadget.

I also chose to enable the Serial Gadget and the CDC Composite De
vice (Ethernet and ACM).

After building the kernel and replacing the files on the SD Card, I changed the module load line in /etc/network/interfaces to load the g_cdc module instead of the g_ether module, and added an entry in /etc/inittab for /dev/ttyGS0 to also have a console through the host port.

Debugging Java proxy settings

Java proxy settings are highly annoying. On Windows and Mac, Java does use the system proxy settings, but it doesn’t necessarily understand the same syntax as say IE or Safari/WebKit for the proxy exceptions. The end result is that you keep guessing why certain services deep inside your huge web application keep failing in mysterious ways.  On other platforms, you have to configure the proxy through system properties. Restarting a web application to test out configuration changes can take a long time.

While solving the problem might not be easy, at least I can help with debugging it, with a very simple one-liner: Java Proxy Check (GitHub, direct download link).

For java.net.URL and most other HTTP client code, Java 7 uses a class that can decide on a per-URL basis which proxy should be used: java.net.ProxySelector. javaproxycheck.jar can be run  from the command line to quickly test one or more URLs and see which proxy is selected for that URL:

$ java -Dhttps.proxyHost=proxy.example.com -Dhttps.proxyPort=3128 -jar javaproxycheck.jar http://www.example.com https://secure.example.com
http://www.example.com                   [DIRECT]
https://secure.example.com               [HTTP @ proxy.example.com:3128]

On Mac OS X and Windows, Java uses the system proxy configuration; on other systems, it optionally can use Gnome settings, but by default relies on system properties being set at startup, as documented in Networking Properties, Proxies.

nsupdate woes

Over the past three days, I’ve been trying unsuccessfully to set up a fresh name server (using Ansible and Vagrant) to play around with nsupdate and some potential middleware to automate updating DNS zones. Unfortunately, I couldn’t find any good documentation on all the specifics, just a lot of how-tos that somehow all did’t really work for me. I kept getting this error:

client 127.0.0.1#60530: request has invalid signature: TSIG example.com: tsig verify failure (BADKEY)

I will upload my Ansible role for this to Github shortly, but I felt it necessary to spare the next person the pain of getting it all to work.

To use nsupdate, you need to give bind a key, associate that with a zone, and then use that key with nsupdate. Sounds easy enough, right? What all the tutorials fail to mention is that the key files and the name of the key entries in named.conf are all significant.

First, you need to decide what to call your key. It doesn’t matter for which zones you will use it, or from which hosts you will run nsupdate, but you will need to pick a name and stick to it. You can’t change it later, you will need to create a new key if you don’t like the name.

$ dnssec-keygen -a HMAC-MD5 -n HOST -b 512 mysamplekey

This will create two files. You need both of them, and you can’t change the files’ names.

Next up, you need to add the key to named.conf, and allow requests signed by that key to update a zone (or more):

key "mysamplekey" {
    algorithm hmac-md5;
    secret "base 64 encoded key";
};

zone "example.com" {
    allow-update { key "mysamplekey"; };
    type master;
    file "dynamic/example.com";
};

It is important to remember that “mysamplekey” needs to be the exact same string as from the key generation!

Armed with this configuration, you should be able to update example.com:

$ nsupdate -k Kmysamplekey+123+45678
debug yes
server 127.0.0.1
zone example.com
update add foobar 10 A 192.0.2.1
send

Ab Herbst muss man auch seinen PC rooten

Wer noch nichts davon gehört hat: Mit Windows 8 hat Microsoft die BIOS- und Systemhersteller „überzeugt“, dass PC nur dann mit Windows 8 geliefert werden dürfen, wenn diese SecureBoot unterstützen und per Default aktiviert haben. Gnädigerweise erlaubt Microsoft den Herstellern, SecureBoot abschaltbar zu machen. Wie einfach das geht, und ob es überhaupt implementiert wird, bleibt aber den Herstellern überlassen. Soweit so schlecht.

Fedora hat sich jetzt entschieden, über das Microsoft-Programm ihren Bootloader zu signieren, damit man in Zukunft Fedora booten (und installieren) kann, ohne SecureBoot auszuschalten.

Booting from an USB disk – even when your system doesn’t support it

I like using VMware Fusion on my Mac, but it has one shortcoming: it cannot boot from USB devices. You can use disk images (floppy, CD/DVD and harddisk) as well as a physical optical drive, but USB devices are not available. That’s unfortunate if you want to use VMware to prepare a hard disk for a machine, and want to test booting off that system before installing it in the machine.

When I install a new FreeBSD machine, I often start out from an existing FreeBSD machine and install directly from that running system, instead of booting off an install DVD. Obviously, using a virtual machine for this bootstrapping system, together with a USB hard disk adapter, is very convenient. But without being able to boot the VM off that USB disk, testing can be cumbersome.

I was very happy to come across Plop, a boot manager with many features. The most interesting one for me is it’s support for booting off USB devices without BIOS support. Plop includes its own U/O/EHCI driver, supporting standard USB 1.1 and USB 2.0 devices and ports.

Also very important: Plop can be run off a CD or floppy image, so you don’t need to (re-)configure your main hard disk. If I feel adventurous, I might look into patching the Plop BIOS extension into VMware, making booting even easier. For the time being, I’m using the floppy image, since none of my virtual (nor physical) machines have floppy drives any more.

Also, when you have an older machine which BIOS does not support booting off USB devices, Plop might be very helpful!

TEMPer USB Thermometer

Measuring temperature in a PC should be easy: after all, most mainboards have extensive monitoring capabilities for temperature and voltage levels built-in. Unfortunately, very few of these facilities are documented properly, and software support is lacking. Instead of trying to navigate the maze that is lm-sensors (which isn’t even available for FreeBSD), I decided to look for some USB-based solution.

There’s a reasonably cheap chinese USB thermometer called TEMPer. I got mine from Brando for 12 Euros. It’s a USB-to-serial chip from WinChipHead. It’s DTR, RTS, and CTS lines are used to connect a LM75 I²C temperature sensor. To talk to the LM75, you need some bit-banging driver.

I’ve put together a command line utility for the TEMPer that can program the built-in thermostat (TEMPer has a LED connected to that output) and print out temperature measurement data. It does it’s job, and might serve as an example on how to do I²C over a simple interface.

Fixing Flash for Linux Firefox-3.5.2

If you have trouble with Flash segfaulting in Linux Firefox-3.5.2 (the symptom is a browser hang), I fixed that by downgrading Flash from Flash10 to Flash9. Of course Flash9 is full of security holes. In combination with the Flashblocker Firefox extension and only activating it on trusted sites it seems like a reasonable approach. Of course for all we know the newest Flash10 is full of security problems, too.