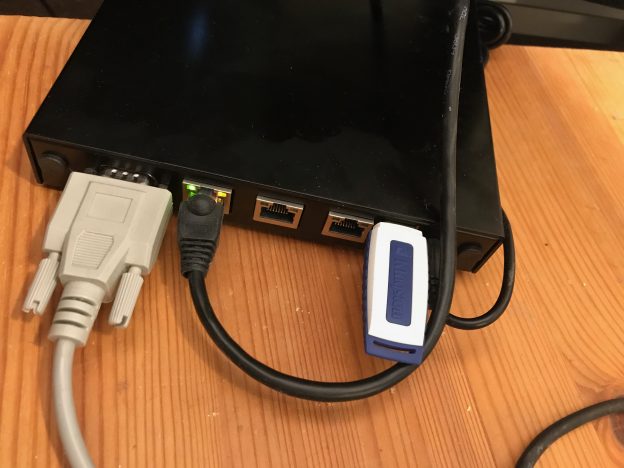

The PC Engines APU2C low-power network computer on my desk, with serial console, the first ethernet port and a USB stick connected.
PC Engines has been producing small, low-power systems with AMD CPUs for a long time. Among the great features for building your own router are built-in serial console and multiple quality Ethernet controllers. For a project I selected the apu2c4, a system with three gigabit Ethernet ports and 4 GB of RAM. Together with a small M2 SSD module, you have a decently powerful machine to run as a router. In fact, it has enough capacity to run some applications as well, or even small VMs if you’re so inclined!
Installing FreeBSD
Installing FreeBSD on the APUs is fairly straightforward; however, a small number of gotchas might trip you up. Here’s how I managed to complete the install, and update the APU firmware once I had FreeBSD installed.
- Download the FreeBSD memstick installer image. I used my closest FreeBSD mirror to download
FreeBSD-11.2-RELEASE-amd64-memstick.img. - Copy the image to a USB stick that is at least as large as the image; 1 GB should be sufficient. I had trouble when I did the copying on my Mac with the resulting stick not working properly; using a FreeBSD box did the trick for me.
- Before booting from the USB stick, mount the UFS partition on a FreeBSD machine. For 11.2, that’s
da0s2a; for other releases, it might be different. You can usegpart listto identify the UFS partition to mount. - Add the following lines to
/mnt/boot/loader.confto properly enable just the serial console, and give the USB subsystem enough time to attach the USB stick: -
vfs.mountroot.timeout="10"
comconsole_speed="115200"
console="comconsole"
- Unmount
/mntand move the stick to the APU. - Connect a serial terminal to the APU console port; I usually use an USB dongle and a null modem cable or adapter, and my own simple serial console program or cu(1), using 115200 baud.
- Boot from the USB stick and install FreeBSD as you would on any other PC. Before you reboot:
- Make sure to add the
consoleandcomconsole_speedvariables to/boot/loader.confon the installed system on the APU as well. Unless you add them, you won’t be able to log in to the console.
If you forget to edit /boot/loader.conf, not all is lost: you can change the settings during boot. But because the loader detects both the serial console and a keyboard (although the APU has no support for a keyboard or built-in graphics), it is somewhat cumbersome, as the console output will be screwed up.
Updating the BIOS
The APUs use CoreBoot as their BIOS. PC Engines has ready to use CoreBoot images on their own GitHub page. You can update the BIOS using flashrom, a command line tool to program firmware devices across many devices and platforms.
To update the APU BIOS:
- Download the correct CoreBoot image for your model of APU from pcengines.github.io, directly to the APU. I picked
apu2 v4.8.0.1, which was the newest at the time of this post. - Extract the firmware file:
-
$ fetch http://pcengines.ch/file/apu2_v4.8.0.1.rom.tar.gz
apu2_v4.8.0.1.rom.tar.gz                      100% of  852 kB 4100 kBps 00m00s
$ tar xf apu2_v4.8.0.1.rom.tar.gz
$ ls -l
total 862
-rw-r--r--  1 stb  wheel  8388608 Jun  8  2018 apu2_v4.8.0.1.rom
-rw-r--r--  1 stb  wheel       52 Jun  8  2018 apu2_v4.8.0.1.rom.md5
-rw-r--r--  1 stb  wheel   873087 Jun 26  2018 apu2_v4.8.0.1.rom.tar.gz
- Install the utility:
$ sudo pkg install flashrom Updating FreeBSD repository catalogue... FreeBSD repository is up to date. All repositories are up to date. Checking integrity... done (0 conflicting) The following 1 package(s) will be affected (of 0 checked): New packages to be INSTALLED: flashrom: 1.0 Number of packages to be installed: 1 Proceed with this action? [y/N]: y [1/1] Installing flashrom-1.0... [1/1] Extracting flashrom-1.0: 100% - Check that
flashromcan talk to your motherboard OK: -
$ sudo flashrom -p internal
flashrom v1.0 on FreeBSD 11.2-RELEASE (amd64)
flashrom is free software, get the source code at https://flashrom.org

Using clock_gettime for delay loops (clk_id: 4, resolution: 2ns).
coreboot table found at 0xcfde9000.
Found chipset "AMD FCH".
Enabling flash write... OK.
Found Winbond flash chip "W25Q64.V" (8192 kB, SPI) mapped at physical address 0x00000000ff800000.
No operations were specified.
- Verify the version currently installed:
-
$ sudo dmidecode -t bios # dmidecode 3.1 Scanning /dev/mem for entry point. SMBIOS 2.7 present. Handle 0x0000, DMI type 0, 24 bytes BIOS Information Vendor: coreboot Version: v4.8.0.1 Release Date: 20180608 ROM Size: 8192 kB Characteristics: PCI is supported PC Card (PCMCIA) is supported BIOS is upgradeable Selectable boot is supported ACPI is supported Targeted content distribution is supported BIOS Revision: 4.0 Firmware Revision: 0.0 - Program the new version to the flash chip:
-
$ sudo flashrom -p internal -w apu2_v4.8.0.1.rom
- If
flashromcomplains about the image not matching the mainboard, you need to force the programming as suggested in this forum post. - Reboot the APU to activate the new firmware.
(Astute readers will notice that the above output already shows version 4.8.0.1 being installed; I took that output after successfully upgrading.)
I tried to update the BIOS using the procedure suggested by PC Engines, using TinyCore, but I had trouble creating a TinyCore USB stick. Luckily I came across this BSD Foren post and realised that I could just use FreeBSD directly.