Category Archives: networking

PC Engines APU2C4

Installing FreeBSD on PC Engines APU2

PC Engines APU2C4

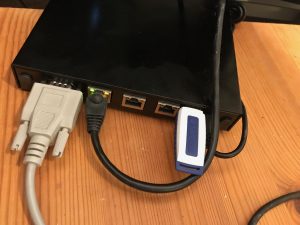
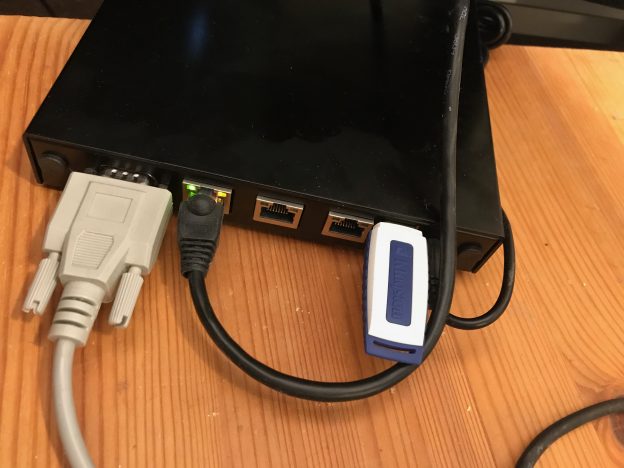
The PC Engines APU2C low-power network computer on my desk, with serial console, the first ethernet port and a USB stick connected.

PC Engines has been producing small, low-power systems with AMD CPUs for a long time. Among the great features for building your own router are built-in serial console and multiple quality Ethernet controllers. For a project I selected the apu2c4, a system with three gigabit Ethernet ports and 4 GB of RAM. Together with a small M2 SSD module, you have a decently powerful machine to run as a router. In fact, it has enough capacity to run some applications as well, or even small VMs if you’re so inclined!

Installing FreeBSD

Installing FreeBSD on the APUs is fairly straightforward; however, a small number of gotchas might trip you up. Here’s how I managed to complete the install, and update the APU firmware once I had FreeBSD installed.

  1. Download the FreeBSD memstick installer image. I used my closest FreeBSD mirror to download FreeBSD-11.2-RELEASE-amd64-memstick.img.
  2. Copy the image to a USB stick that is at least as large as the image; 1 GB should be sufficient. I had trouble when I did the copying on my Mac with the resulting stick not working properly; using a FreeBSD box did the trick for me.
  3. Before booting from the USB stick, mount the UFS partition on a FreeBSD machine. For 11.2, that’s da0s2a; for other releases, it might be different. You can use gpart list to identify the UFS partition to mount.
  4. Add the following lines to /mnt/boot/loader.conf to properly enable just the serial console, and give the USB subsystem enough time to attach the USB stick:
  5. vfs.mountroot.timeout="10"
    comconsole_speed="115200"
    console="comconsole"
  6. Unmount /mnt and move the stick to the APU.
  7. Connect a serial terminal to the APU console port; I usually use an USB dongle and a null modem cable or adapter, and my own simple serial console program or cu(1), using 115200 baud.
  8. Boot from the USB stick and install FreeBSD as you would on any other PC. Before you reboot:
  9. Make sure to add the console and comconsole_speed variables to /boot/loader.conf on the installed system on the APU as well. Unless you add them, you won’t be able to log in to the console.

If you forget to edit /boot/loader.conf, not all is lost: you can change the settings during boot. But because the loader detects both the serial console and a keyboard (although the APU has no support for a keyboard or built-in graphics), it is somewhat cumbersome, as the console output will be screwed up.

Updating the BIOS

The APUs use CoreBoot as their BIOS. PC Engines has ready to use CoreBoot images on their own GitHub page. You can update the BIOS using flashrom, a command line tool to program firmware devices across many devices and platforms.

To update the APU BIOS:

  1. Download the correct CoreBoot image for your model of APU from pcengines.github.io, directly to the APU. I picked apu2 v4.8.0.1, which was the newest at the time of this post.
  2. Extract the firmware file:
  3. $ fetch http://pcengines.ch/file/apu2_v4.8.0.1.rom.tar.gz
    apu2_v4.8.0.1.rom.tar.gz                      100% of  852 kB 4100 kBps 00m00s
    $ tar xf apu2_v4.8.0.1.rom.tar.gz 
    $ ls -l
    total 862
    -rw-r--r--  1 stb  wheel  8388608 Jun  8  2018 apu2_v4.8.0.1.rom
    -rw-r--r--  1 stb  wheel       52 Jun  8  2018 apu2_v4.8.0.1.rom.md5
    -rw-r--r--  1 stb  wheel   873087 Jun 26  2018 apu2_v4.8.0.1.rom.tar.gz
  4. Install the utility:
    $ sudo pkg install flashrom
    Updating FreeBSD repository catalogue...
    FreeBSD repository is up to date.
    All repositories are up to date.
    Checking integrity... done (0 conflicting)
    The following 1 package(s) will be affected (of 0 checked):
    
    New packages to be INSTALLED:
            flashrom: 1.0
    
    Number of packages to be installed: 1
    
    Proceed with this action? [y/N]: y
    [1/1] Installing flashrom-1.0...
    [1/1] Extracting flashrom-1.0: 100%
  5. Check that flashrom can talk to your motherboard OK:
  6. $ sudo flashrom -p internal
    flashrom v1.0 on FreeBSD 11.2-RELEASE (amd64)
    flashrom is free software, get the source code at https://flashrom.org
    
    Using clock_gettime for delay loops (clk_id: 4, resolution: 2ns).
    coreboot table found at 0xcfde9000.
    Found chipset "AMD FCH".
    Enabling flash write... OK.
    Found Winbond flash chip "W25Q64.V" (8192 kB, SPI) mapped at physical address 0x00000000ff800000.
    No operations were specified.
  7. Verify the version currently installed:
  8. $ sudo dmidecode -t bios
    # dmidecode 3.1
    Scanning /dev/mem for entry point.
    SMBIOS 2.7 present.
    
    Handle 0x0000, DMI type 0, 24 bytes
    BIOS Information
            Vendor: coreboot
            Version: v4.8.0.1
            Release Date: 20180608
            ROM Size: 8192 kB
            Characteristics:
                    PCI is supported
                    PC Card (PCMCIA) is supported
                    BIOS is upgradeable
                    Selectable boot is supported
                    ACPI is supported
                    Targeted content distribution is supported
            BIOS Revision: 4.0
            Firmware Revision: 0.0
  9. Program the new version to the flash chip:
  10. $ sudo flashrom -p internal -w apu2_v4.8.0.1.rom
  11. If flashrom complains about the image not matching the mainboard, you need to force the programming as suggested in this forum post.
  12. Reboot the APU to activate the new firmware.

(Astute readers will notice that the above output already shows version 4.8.0.1 being installed; I took that output after successfully upgrading.)

I tried to update the BIOS using the procedure suggested by PC Engines, using TinyCore, but I had trouble creating a TinyCore USB stick. Luckily I came across this BSD Foren post and realised that I could just use FreeBSD directly.
Hooking up Harmony Hub and generic ZigBee Lights to HomeKit

Home automation seems to be the rage this christmas, with gadgets to control lights, heating and entertainment systems wirelessly, maybe even with only your voice.

I’ve been using Logitech’s Harmony Hub for many years now, and are very happy being able to switch on all devices needed and set them to the right channels: the TV, the surround receiver, the TV and an Apple TV, Fire TV or Bluray player, with single button press on a single remote.

Harmony Hub isn’t supported by Apple’s HomeKit, but so far, that wasn’t really a concern, since I wasn’t using anything else that would be able to be controlled by HomeKit. But in December, I broke down and got a bunch of Philips Hue lights. Naturally, tying Hue and Harmony together became a challenge.

I also have a number of light fixtures that Philips has no bulbs for; I decided to get an Osram Lightify Smart Plug to be able to at least turn the light off and on through the system. While it’s simple to connect the Smart Plug to the Hue controller, Philips somehow fails to offer up 3rd-party devices to either HomeKit or Hub. (Ikea Tradfri components seem to suffer the same fate.)

So I started looking around, to find a way to control everything through a single interface. It seems that HomeKit together with homebridge manages to do exactly what I want: offer all devices connected to the Hue hub to HomeKit (through homebridge-hue), and allow me to control the Harmony Hub (through homebridge-harmonyhub).

Here’s how I got this all working in FreeBSD.

Installing homebridge on FreeBSD

Creating a user

homebridge is a daemon process that mediates between HomeKit, Hue and Harmony. As such, it needs to run permanently. For security reasons, we do not want to run homebridge as root, but as a less privileged user homebridge. To create the user, I used vipw and consulted /usr/ports/GIDs to look for an id in the range below 1000 that is not yet used by any port. Instead of vipw, you can use adduser(1). I gave the user /usr/sbin/nologin as a shell since we’re never going to log in directly as a user.

Installing packages

There is no FreeBSD port for homebridge, but the installation is relatively straightforward. The installation instructions for homebridge insist that the NPM must be installed globally; I briefly tried to install locally, but couldn’t get it work.

Let’s start with the prerequisites, and a hack:

# pkg install npm-node8 avahi-libdns
# ln -s /usr/local/include/avahi-compat-libdns_sd/dns_sd.h /usr/local/include

The FreeBSD port for avahi-libdns puts the include file into its own subdirectory (so it won’t conflict with mDNSResponder), but the NPM packages expect it to be in /usr/local/include. The easiest way to fix this is to create the symlink. Since I’m running avahi, I have not investigated how to run homebridge with mDNSResponder.

After this, we can starting installing the NPM packages:

# npm install -g mdns
# npm install -g --unsafe-perm homebridge
# npm install -g homebridge-hue homebridge-harmonyhub

As of homebridge-harmonyhub 0.2.1, you’ll need to hack the broadcast address that it uses to find the Harmony Hub. Edit /usr/local/lib/node_modules/homebridge-harmonyhub/node_modules/harmonyhubjs-discover/lib/ping.js and change the address in line 9 to the appropriate broadcast address for the network that your Hub is connected to. For example:

this.address = '192.168.1.255';

Configuring Homebridge

Create a config file in the homebridge users’ home directory, as .homebridge/config.json. I created the initial file like this:

{
    "bridge": {
        "name": "Homebridge",
        "username": "CC:22:3D:E3:CE:30",
        "port": 51826,
        "pin": "031-45-154"
    },
    
    "description": "My Homebridge",

    "accessories": [
    ],

    "platforms": [
        {
            "platform" : "Hue",
            "name" : "Hue",
            "users": {
            },
            "lights": true,
            "nativeHomeKit": false,
            "sensors": true,
            "excludeSensorTypes": ["CLIPPresence", "Geofence"]
        },
        {
            "platform": "HarmonyHub",
            "name": "Hub",
        }
    ]
}

Then, start homebridge for the first time:

sudo -u homebridge homebridge

The output from this is important in two ways: homebridge-hue will connect to the Hue bridge, wait for you to press the button to authorise the pairing, and then display the username and token for this connection. You’ll need to copy the output and add it to the users key for the Hue platform entry in the configuration. You will need to restart homebridge for this config change to become effective.

Also, the terminal output will show a QR code you can use to connect homebridge as a bridge to HomeKit, using the Home app on your phone or iPad. You can also enter the code manually, in this example the code is 031-45-154.

Running homebridge as a daemon

There’s (at least) two ways to run homebridge in the background: using tmux(1) or daemon(8)

WIth tmux(1) (or screen(1)), you can run a terminal session independent of the current login. You can detach from that session at any time, and it will continue to run; you can also re-attach at a later time. This allows you to start homebridge, observe all the log output, and then detach from the session, keeping it running. If you need to look at the log output, you can reattach. This is most useful while you’re optimising the configuration, or trying out additional plugins.

For a more production-oriented setup, you can use daemon(8) and an rc(8) script. The following script /usr/local/etc/rc.d/homebridge creates a service homebridge that you can enable and disable from rc.conf(5):

#!/bin/sh
#
# PROVIDE: homebridge
# REQUIRE: NETWORKING SYSLOG
# KEYWORD: shutdown
#
# Add the following lines to /etc/rc.conf to enable homebridge:
#
#homebridge_enable="YES"

. /etc/rc.subr

name="homebridge"
rcvar="homebridge_enable"

load_rc_config $name

: ${homebridge_user:="homebridge"}
: ${homebridge_enable:="NO"}
: ${homebridge_facility:="daemon"}
: ${homebridge_priority:="debug"}

command="/usr/local/bin/${name}"
procname="/usr/local/bin/${name}"
home="$(eval echo ~${homebridge_user})"

pidfile="/var/run/${name}.pid"

start_cmd="${name}_start"

homebridge_start() {
	/usr/sbin/daemon -S -l ${homebridge_facility} -s ${homebridge_priority} \
		-u ${homebridge_user} -p ${pidfile} \
		/usr/bin/env -i \
		"HOME=${home}" \
		"PATH=/usr/local/bin:${PATH}" \
		$command
}

run_rc_command "$1"

Now the last thing I need to figure out is which Siri commands to use to activate a scene. Then I can switch on the entertainment center and dim the lights with a single voice command!

Getting started with the Arietta G25 board

This weekend, I received my ACME Arietta G25 Atmel ARM board, and tried to get it going with my Mac. I ordered the “plain” version with 128 MB RAM, as well as one with 256MB RAM, as well as Wifi boards and the DPI debug board.

After soldering in the necessary posts, I attached the DPI board and verified that my Mac has the right FT232 driver to access the console, no problems here.

I then fired up by Ubuntu VirtualBox machine and followed the instructions to build the Micro-SD-Card image. I then proceeded to boot successfully from the card.

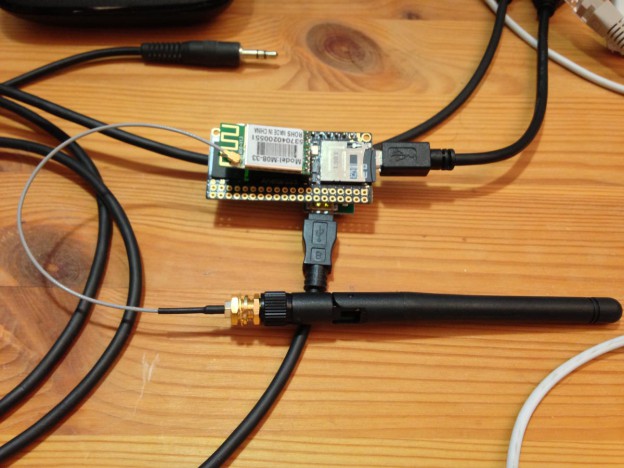
IMG_2989

Through the console, I could get the Wifi card going; since I wanted to have support for more than a single network, I extended the configuration through wpa_supplicant.conf.

ACME has configured a Gadget driver to supply an Ethernet interface through the host port on the Arietta; in ACMEs configuration, this is set to offer both RNDIS and CDC EEM modes. Unfortunately, Mac OS X 10.9 doesn’t support either.

After some more reading, I decided to build my own kernel and modules. To get a Mac-compatible setup for the USB Gadget driver, run menuconfig, and navigate to

  • Device Drivers
  • USB support
  • USB Gadget Support (at the very bottom of the list)

For Mac compatibility, de-select the RNDIS support and the Ethernet Emulation Model (EEM) support under Ethernet Gadget.

I also chose to enable the Serial Gadget and the CDC Composite De
vice (Ethernet and ACM).

After building the kernel and replacing the files on the SD Card, I changed the module load line in /etc/network/interfaces to load the g_cdc module instead of the g_ether module, and added an entry in /etc/inittab for /dev/ttyGS0 to also have a console through the host port.

Debugging Java proxy settings

Java proxy settings are highly annoying. On Windows and Mac, Java does use the system proxy settings, but it doesn’t necessarily understand the same syntax as say IE or Safari/WebKit for the proxy exceptions. The end result is that you keep guessing why certain services deep inside your huge web application keep failing in mysterious ways.  On other platforms, you have to configure the proxy through system properties. Restarting a web application to test out configuration changes can take a long time.

While solving the problem might not be easy, at least I can help with debugging it, with a very simple one-liner: Java Proxy Check (GitHub, direct download link).

For java.net.URL and most other HTTP client code, Java 7 uses a class that can decide on a per-URL basis which proxy should be used: java.net.ProxySelector. javaproxycheck.jar can be run  from the command line to quickly test one or more URLs and see which proxy is selected for that URL:

$ java -Dhttps.proxyHost=proxy.example.com -Dhttps.proxyPort=3128 -jar javaproxycheck.jar http://www.example.com https://secure.example.com
http://www.example.com                   [DIRECT]
https://secure.example.com               [HTTP @ proxy.example.com:3128]

On Mac OS X and Windows, Java uses the system proxy configuration; on other systems, it optionally can use Gnome settings, but by default relies on system properties being set at startup, as documented in Networking Properties, Proxies.

nsupdate woes

Over the past three days, I’ve been trying unsuccessfully to set up a fresh name server (using Ansible and Vagrant) to play around with nsupdate and some potential middleware to automate updating DNS zones. Unfortunately, I couldn’t find any good documentation on all the specifics, just a lot of how-tos that somehow all did’t really work for me. I kept getting this error:

client 127.0.0.1#60530: request has invalid signature: TSIG example.com: tsig verify failure (BADKEY)

I will upload my Ansible role for this to Github shortly, but I felt it necessary to spare the next person the pain of getting it all to work.

To use nsupdate, you need to give bind a key, associate that with a zone, and then use that key with nsupdate. Sounds easy enough, right? What all the tutorials fail to mention is that the key files and the name of the key entries in named.conf are all significant.

First, you need to decide what to call your key. It doesn’t matter for which zones you will use it, or from which hosts you will run nsupdate, but you will need to pick a name and stick to it. You can’t change it later, you will need to create a new key if you don’t like the name.

$ dnssec-keygen -a HMAC-MD5 -n HOST -b 512 mysamplekey

This will create two files. You need both of them, and you can’t change the files’ names.

Next up, you need to add the key to named.conf, and allow requests signed by that key to update a zone (or more):

key "mysamplekey" {
    algorithm hmac-md5;
    secret "base 64 encoded key";
};

zone "example.com" {
    allow-update { key "mysamplekey"; };
    type master;
    file "dynamic/example.com";
};

It is important to remember that “mysamplekey” needs to be the exact same string as from the key generation!

Armed with this configuration, you should be able to update example.com:

$ nsupdate -k Kmysamplekey+123+45678
debug yes
server 127.0.0.1
zone example.com
update add foobar 10 A 192.0.2.1
send

Download from Tivo fails with HTTP error 400

So tonight I was wondering why no new shows had been downloaded from my Tivo to my file server. Investigating my home-grown script’s log output, I  could see that all download attempts were met with an HTTP error 400 since Sunday. (My script works similarly to kmttg.)

I immediately tried in Safari, and had no problems downloading one of these shows. So more debugging was necessary. Enabling additional output for Python’s urllib2 (used for downloading the XML table of contents) and curl (used for downloading the media files) showed an unusual Set-cookie response header on all of the requests, setting a new value for the “sid” cookie. Quick recap: when you load the XML TOC over HTTPS, the Tivo sets a “sid” cookie which you need to supply to download the actual show’s file. No problem, my script was recording the cookie using cookielib.CookieJar, passing the resulting file to curl. Or so I thought. Inspecting the cookie jar I found it to be empty. How could that be?

At this point I turned to Firefox and the Live HTTP Headers extension. Interestingly, the problem was the same in Firefox, so it wasn’t a problem in my script. but was was going wrong? After some experimentation with variations of the Set-cookie header (using my internal web server and Apache’s very useful mod_asis), plus remembering the details of the cookie protocol, it became clear:

Set-Cookie: sid=542329DF12A3586B; path=/; expires="Saturday, 16-Feb-2013 00:00:00 GMT";

If a cookie has an expires attribute, and the current date and time is later than the date specified, the cookie becomes invalid, and the HTTP client should remove it and not transmit it anymore. If a server sends a Set-Cookie header with an expires attribute in the past, the cookie should be deleted. Bingo! (Safari  had an old cookie still set, so the Tivo just used that and did not remove the cookie.)

So the Tivo is apparently trying to set a persistent cookie (confusingly named “sid” as it’s not a session cookie), but doing so with a date in the past. And everything was working just fine until last Saturday! So either Tivo pushed a software update on Sunday, changing the expires date of that cookie, or it has had that date for ever, and eternity just ran out. I haven’t reverse engineered the firmware, but I would bet that someone way back when Tivo got started hard-coded the date “way in the future”, and everbody promptly forgot about it.

No word from Tivo yet, but this Tivo forum thread mentions the same broken cookie.

I managed to add a hack to my script that extracts the “sid” from the Set-Cookie header manually and hand the proper cookie value to curl for the downloads. And I got to learn about mechanize for Python!

Prepaid Mobile Data in France

For a recent two-week vacation in France, I wanted to get the netbook and the iPhones (SIM-locked) online, without having to hunt down hotel wifi or other hotspots. Unfortunately, the situation is not quite as simple as in Germany, where there’s many reasonable priced options. Here’s what I managed to find out.

Orange offers a prepaid data plan (“journée Internet max”) for 3 Euros a day, but by various accounts, it is limited to web access only (no email etc.), and might even have restrictions on the sites you can browse to. I didn’t try that. Orange also offers an iPad option.

SFR offers a special “iPhone 3G” tariff that seemed quite interesting at first: full web access as well as email, in multiple packages up to 20 euros for 20 days and 500MB. They specifically claim that it only can be used with an iPhone. To get it, you buy a pre-paid SIM card (SFR La Carte) from any of the SFR stores, and one of the iPhone 3G recharges (see the bottom of that page). The recharge is a long number that you can punch in at a voice prompt after dialling 952. I had a French speaker help me with that. At least in Paris, most of the SFR store people I’ve encountered speak passable or very good English, and they were all friendly and helpful, and did help with the activation. You then configure your device to use APN “wapsfr”, and off you go.

With the iPhone package, data connections are indeed limited, but a lot more that I originally thought: surfing was limited to the SFR mobile portal (m.sfr.fr). Whether this was due to the fact that I was using a Mifi to establish the data connection, or due to some real limitation on the part of SFR, I’m not sure, but I’ve read elsewhere that others have encountered this block as well.

Even when accessing the mobile portal, you must use Safari on your iPhone, or make your other browser appear as an iPhone. For Safari, enable the Developer menu, and change the User Agent to one of the Mobile Safari entries. I believe there’s a number of Firefox Add-ons that allow you to change the User Agent.

The good news is that email access via IMAP and SMTP worked just fine, with all our accounts configured.

To get full internet access, I used OpenVPN from the netbook to connect to my server running on one of the ports usually used for email. This way, I could move all the internet traffic through the VPN, and have full internet access from the laptop.

Finally, to be able to browse from the iPhones as well, I used tinyproxy on the netbook to enable the iPhones to use the netbook as a proxy that connects through the VPN. This gave us full internet access throughout our journey.

Getting things purchased and activated was a bit of an adventure, but was fairly straightforward in the end. I was positively surprised by the coverage (minimum EDGE, mostly HSPA), even though we went to some slightly remote places (small villages on the Loire, Mont Saint Michel). All the descriptions claimed that services were limited to “France métropolitaine”. Also, I was surprised that we seemingly didn’t exceed the 500MB limit, even though the traffic counter on the Mifi claimed we had.

I can recommend this only to people very familiar with networking technology and the willingness to spend a couple of hours in the hotel room fiddling, instead of on the streets of Paris. So plan to bring your favorite geek along for the ride 🙂

Getting started with IPv6

Getting started with IPv6 on FreeBSD with Hurricane Electric’s free Tunnelbroker service is really straightforward. Since I’m behind a residential ADSL connection, my IPv4 address changes every 24 hours, so whenever that happens, the Tunnelbroker needs to learn my new address. We’ve put up a quick how-to on the wiki on how to do that.